The Best Way to Remove Glued-Down Linoleum Without Destroying the Subfloor
Tearing up old flooring rarely goes according to plan. You start with high hopes, thinking you can knock the project out in an afternoon, only to find yourself on your hands and knees scraping away an indestructible layer of sheet flooring that seems chemically bonded to the wood or concrete beneath it. When that material is glued-down linoleum, the frustration multiplies. Manufacturers designed these floors to stay put permanently, and the industrial adhesives used decades ago often maintain their grip long after the surface has worn out.
The real danger in this demolition work lies not in getting the linoleum off, but in preserving what sits underneath. Whether you are dealing with a historic tongue-and-groove pine subfloor or a modern plywood underlayment, gouging the wood with a sharp scraper or soaking it in the wrong chemicals creates expensive repair work before your new flooring can even be installed. Striking the right balance between aggressive removal and careful preservation comes down to understanding how the layers are constructed and using heat, moisture, and mechanical leverage in the right order.
Understanding What You Are Fighting
Before taking a pry bar to the room, you need to know what kind of subfloor you have. Plywood and oriented strand board tolerate moisture and moderate scraping fairly well, though they can splinter if attacked with too much force. Solid wood subfloors, common in older homes, expand and warp when exposed to standing water or excessive heat.
Another critical factor is the age of the installation. Homes built before the 1980s frequently contain asbestos in either the linoleum backing, the felt layer, or the black cutback adhesive used to secure it. If there is any doubt about the age of the floor, purchasing a test kit from a local hardware store or having a professional sample analyzed takes only a few days and prevents a major health hazard. If asbestos is present, standard scraping is out of the question, and professional abatement becomes necessary. Assuming the material tests clean, you can proceed with the manual removal process.
Essential Tools and Safety Gear
Skipping the right equipment turns a manageable weekend project into an exhausting ordeal. Arm yourself with proper gear before touching the floor:
-
Heavy-duty work gloves to prevent painful blisters from hours of gripping tools.
-
Knee pads because you will spend a significant amount of time working close to the floor.
-
A respirator rated for dust and chemical vapors if you plan to use adhesive removers.
-
A heavy-duty floor scraper with a long handle and a replaceable steel blade.
-
A standard heat gun or a wallpaper steamer.
-
A stiff-bristled nylon brush and plenty of clean rags.
Stripping the Surface Layer
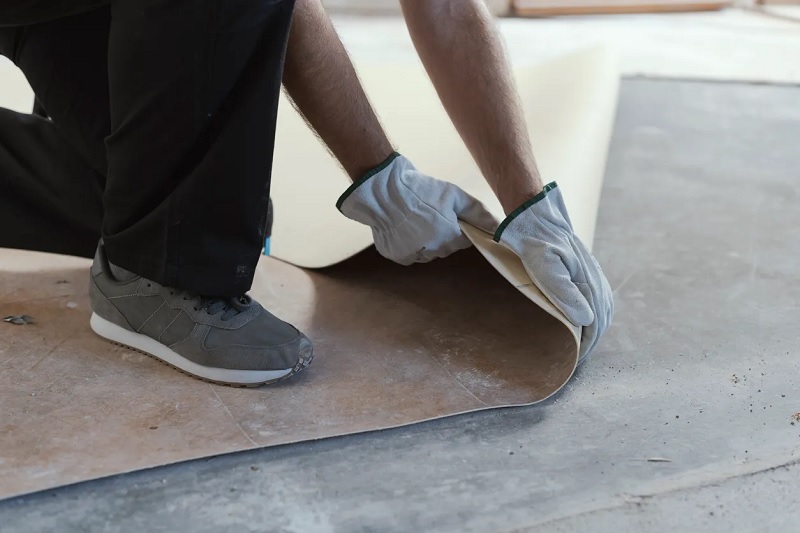
The linoleum itself usually consists of a wear layer, a decorative core, and a fabric or paper backing glued directly to the subfloor. Trying to peel the entire sandwich up at once usually results in tearing the top layer off while leaving the backing and glue stubbornly attached.
Start by finding an edge or a seam, preferably near a heating vent or a corner where the adhesive might have degraded over time. Use a utility knife to slice the linoleum into manageable strips about twelve inches wide. Scoring the material gives you manageable sections to peel rather than fighting an entire room at once.
Slide a flat pry bar or the edge of your floor scraper under one of the scored strips. Apply steady, upward pressure while pulling the strip back toward your body at a shallow angle. If the flooring was installed with a water-soluble adhesive from decades ago, moisture can be your best friend. Applying hot water or running a steam machine over a section for a few minutes can reactivate the old glue and allow the linoleum to release cleanly.
Tackling the Residual Backing and Adhesive
Once the top layers of linoleum are gone, you will almost certainly be left with a crusty layer of paper backing and hardened brown or black mastic. This is where most DIYers ruin their subfloors by grabbing a heavy steel scraper and gouging deep trenches into the wood.
Heat Application for Stubborn Spots
For areas where the glue refuses to budge, a standard heat gun works wonders. Sweep the heat back and forth across a small two-foot section for thirty seconds to soften the adhesive without scorching the wood. As soon as the mastic turns pliable, push your floor scraper underneath it at a low angle, letting the blade glide parallel to the subfloor rather than digging down into it. Keep a damp cloth nearby to wipe away the loosened glue before it has a chance to cool and reharden.
Choosing the Right Chemical Solvents
When heat fails or the adhesive layer is paper-thin, chemical strippers provide a reliable alternative. Avoid harsh petroleum-based solvents that leave lingering odors or damage surrounding finishes. Instead, look for citrus-based or soy-based mastic removers specifically formulated for flooring adhesives.
Pour a small amount of the remover onto the stubborn spots and let it sit according to the manufacturer instructions—usually between fifteen and thirty minutes. The liquid penetrates the dried glue, turning it into a gel-like consistency that can be wiped away with a putty knife or scrubbed off with a nylon brush. Rinse the area thoroughly with clean water and dry it completely with towels to prevent the subfloor from warping.
Preparing the Subfloor for Your New Finish
With the linoleum and old adhesive completely cleared away, take a close look at the subfloor. Drive in any protruding nails or staples that managed to survive the scraping process. Run your hand across the surface to feel for rough patches, minor gouges, or leftover adhesive residue.
Sand down any minor high spots using a handheld orbital sander with medium-grit sandpaper. If you accidentally gouged the wood during the scraping process, fill those depressions with a wood patch compound designed to take screws and foot traffic. Allow the subfloor to dry completely for at least forty-eight hours before installing underlayment or laying down new flooring. Taking this extra time ensures a smooth, level foundation that will keep your new floors looking pristine for years to come.